How To Take Great Lake George Vacation Photos
Note: These tips were written by Sara Mannix, photography enthusiast and founder of LakeGeorge.com!
I'm not a professional photographer...but I watched one on TV! Fundamentals of Photography by Joel Sartore of National Geographic features two dozen 31-minute lectures that will help you "see" like a photographer, and I found it to be extremely valuable. If you don't have 12 hours to watch the videos, simply read my takeaways in this article!
I gained alot through Sartore's series, and although I wouldn't claim my photos are great, the principles that I learned have greatly improved my own images. I hope they'll help you too!
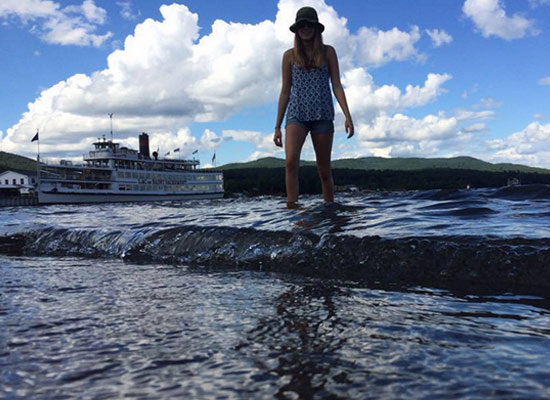
1. Get High Or Get Low
How low can you go? My daughter had a friend take the image below with her iPhone, and as you can see, photos captured at water-level can be really interesting. It should be noted that this image was taken with an iPhone on a sunny day by a 15-year-old with no extra lighting, but it's still a great example of seeing things from a different perspective!
How high can you get? A useful tip I learned is that anyone over the age of 35 looks better when the shot is taken slightly higher than straight on.
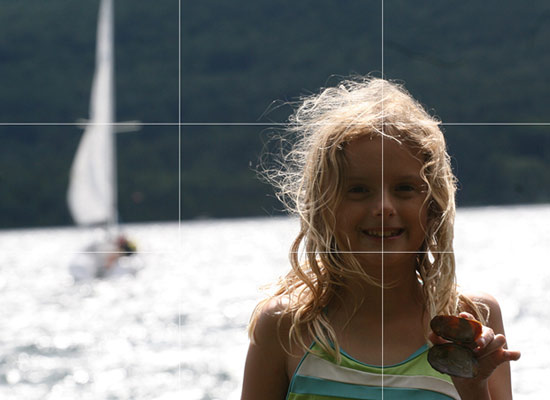
2. Use The Rule Of Thirds
Photos are much more interesting when you think about composition, and one of the main guidelines of composition is the Rule of Thirds. It may sound counterintuitive, but the Rule of Thirds says you shouldn't always put your subject dead center in the middle of the photo.
If you divide the scene into thirds (horizontally and veritcally, as you can see in the grid below) and align your subject mentally in the cross section of one of the "lines", you'll find that your photos become instantly more visually interesting.
On the other hand, here's an example of a photo with the subject directly in the middle of the scene and a few other composition errors:

Why it's wrong:
- Too Much Competition: The eyes are the main focus, but his head is competing with the tree and the clothesline. Eyes shouldn't compete with busy objects.
- Too Centered: By placing the person dead center, this portrait doesn't tell an interesting story, and has no layers. If the subject was offset, the scenery would mean more.
- No Framing: If I had taken the photo from a higher location - from on top of a picnic table, for example - the tree would have framed the subject perfectly and his face wouldn't have been competing with a busy background.
3. Shoot When The Light Is Magical
There are two "magical" times of day, and to find out when they are, all you have to do is Google one of these two questions:
- When does the sun rise?
- When does the sun set?
These two times of day offer amazing lighting that makes it hard to take a bad shot. Sunset is the easiest "magical" time of day to take pictures since you have 15 minutes before and an hour after when the light is still great, but you can get excellent photos at either time. Photos on the beach and near water are particularly stunning during these "magical" times!
Here's a shot taken at sunset:

4. Consider The Background
Photographers look first at the background, and build from the back, forward. Be sure to think about where the best light is and how you want the resulting image to feel!
Scout it out, walk around and plan where your photo would look the best. Don't forget to change your perspective as necessary! In the sunset image above, I needed to stand on a seat and take the shot from higher up in order to get the lake behind their faces, rather than the mountains.
5. Get Closer
Focus first on the eyes, then move closer. It's ok if you cut off a tip of their hair, but then move closer. Think about the scenery, then move even closer! Zoom in with your feet first, then the lens if needed.
Here's an example of how most of us take photos, approximately 4 to 5 feet away from our subject:

But look what happens when you get really, really close!

What I love about the photo above is that it's so close, and there is natural framing with the blanket and hat. This photo also follows the rule of thirds.
You can also try to do the opposite and move farther away from the scene. Sometimes, getting way behind your subject, behind the grasses, trees, or behind crowds taking photos and including them in the shot can be intriguing!
6. Know Where The Light Is
The best photographers look for the light, where it is, and how it is interacting with their subject. Never face people into the sun, as they will squint, and there will be shadows everywhere.
Could the sun light up their hair from the back? Try it!
In a dark scene, is there a street light or natural light flowing from some direction? Find that! Always try to place your subjects in natural light, and don't force the flash on your photos.
7. Make It Straight
When I took the photo below, I thought I was being artsy and clever by using a sideways horizon. The sun was playing on their faces, and I had caught them in a private moment, but it won't make it to my favorite collection as the horizon ruins the photo.

Additionally, the fact that both kids are centered in the photo causes the background to compete with them instead of being the perfect backdrop.
Being artsy is encouraged, but always make sure you keep your horizon straight!
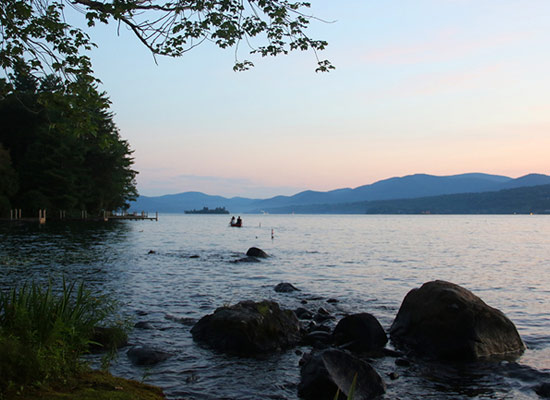
The above photo has four things going for it:
- The horizon is straight (or mostly)
- The light is magical
- The scene is naturally "framed" with rocks and tree limbs adding interest. Think about using the "frames" around you - a door frame, a tree branch, or even rocks - to frame a scene
- There are people to show scale. According to Sartore, people in your photo allow your brain to understand scale and add visual interest
When taking a picture of the lake, line your camera up with the horizon. I put my iPhone on burst mode and move the camera to be sure I have one perfectly angled shot. If I have my Canon, I will just shoot at all angles if I can't line the shot up perfectly.
8. Get Candids!
Take 20 times as many candid shots as you do staged shots, and you can be sure to have an amazing collection! Yes, candid photography can be challenging, but people shouldn't be facing the camera and smiling for every photo. When you perfectly capture a candid moment, it will last a lifetime!

Above is one of my favorite shots. It's messy, but it's our family in the moment making s'mores as we do every time we camp. Looking at the picture instantly takes me back, and I can smell the fire, feel the warm air, and remember how it felt to have all three kids asking for help at the same time.
Capture the moment in the moment!
9. Use Leading Lines
In life, there are natural lines that lead your eye to the subject. These could be the curves of a street or a path, waves or shadows.

The photo above was taken with no filter in the natural light. Although it's a bit blurry, it's a great example of leading lines, as the wake of the boat leads the eye to the subject. Even better is the fact that the sun is casting a beautiful pink light on everything!
10. Be Prepared For Anything
You never know when the perfect moment will arise! Always bring an extra battery, backup memory cards, and anything else you think you might need to capture that ideal shot. Take a practice picture before you leave to make sure everything is in order.
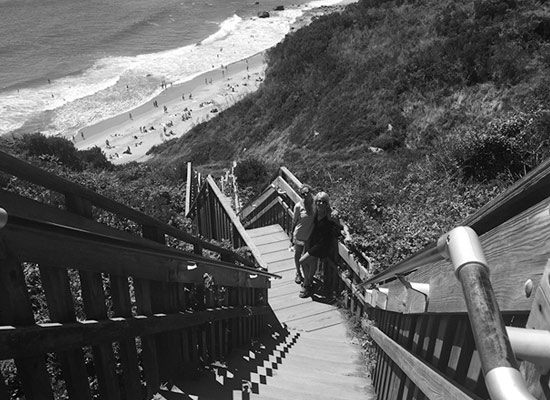
11. Make It Timeless
A great way to make photos timeless is to use black and white. Whether you use a filter when you take the picture or complete edits after the fact, black and white can give your photos a unique feel.
The photo below was taken with my iPhone at Block Island. I loved the leading lines of the staircase, and changing it to black and white made it truly timeless.
Lake George Photo Galleries You Might Enjoy:
Stunning Hiking Views »Lake George Sunrises & Sunsets »
Spectacular Winter Photos »
« Return to the Lake George Photo Guide